Table of Contents
 When you continuously use the water filter for an elongated period, it is bound to give up on you at some point, and of course, drinking water is a daily requirement. Because it is continuously cleaning and filtering out impurities, you have to replace it at some point to continue providing you with fresh and pure water without worrying about getting a weird and dirty taste.
For that, it is recommended that you replace your water filter every six months to ensure a healthy and clean water-drinking experience.
Also, explore our ProOne Water Filter Reviews for top-notch filtration performance.
The genuine Samsung water filters in Samsung refrigerators will usually inform you by indicating a red light that reminds you when to change your Samsung water filter. Acting on it as soon as possible is crucial because it might create problems for your drinking water and your refrigerator.
Most people are scared to change themselves as they feel they will mess the system up, but there are plenty of ways to do it. This article will guide you on effectively selecting and changing your Samsung water filter correctly.
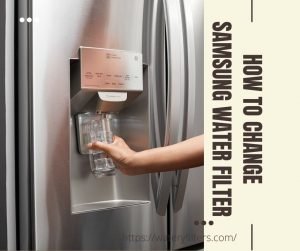
How to change the Samsung water filter
First things first
First, You need to determine what it is you want, as the filters are of three different types. It would help to choose one compatible with your fridge; otherwise, it will cause several problems.
For that, you need to check the refrigerator model first; if you are unsure which one you have, check the product manual that comes with your fridge. Your filter would also show the specific model number, making things easier and clarified for you.
Never use a filter that is not compatible with your refrigerator, they might be tempting you with a lower price, but that will mess up your fridge in the long term, and the quality of water cannot be compromised for the sake of a lesser price.
Locate the filter
Different models of Samsung refrigerators have different configurations for water filters. You need to locate first where your filter is positioned.
For instance, the water filter is between the produce section of the French door and the four flex models, while the side-by-side filter is beside the fresh food section.
Learn more about the effectiveness of water filters in removing lead in our article: Do Water Filters Remove Lead, and Ensure the Safety of your drinking water.
Prepare the filter
For starters, remove the plastic coating that covers the water filter and ensure you unscrew the top of the filter cap correctly, rotating it in the counterclockwise direction.
It is mostly because a build-up might block the movement if you are having difficulty removing it. Just make sure to release some of the water, making it easier to loosen it.
Installation process
Now for the installation part, you should have the filter knob in front of you; all you have to do is turn it to the left, it should be relatively easy, and you don’t have to turn the water supply off to do so but if the filter won’t release, pull your fridge forward and turn off the main supply of water.
For installing your new water, screw it on in the clockwise direction; when you do so, you should be able to hear a click-on sound; this is completely normal and means that the filter has been installed correctly.
Another way to tell if it’s installed correctly is to align the filter with the ‘lock’ symbol. Don’t forget to put a date sticker on your filter so you can be reminded when exactly you need to change the filter; this will help you be prepared.
Work it out
To ensure the newly installed filter works correctly, you must release at least a gallon of water. This step will ensure that the filter is working correctly and that no air blockages are doing so; you will hear airy sounds, which is normal. Proceed to discard all the water; this process will also ensure there are no leakages in the future.
If you want more insights on water filters, you might also be interested in learning about ‘Where Is The Water Filter On a Keurig‘ in our related article.
Reset (Not repeat!)
There should be a crushed ice sign; press it for about three seconds to reset your water filter indicator light, which will return to green. Ensure you don’t press it for long, or you will have to repeat the process from scratch.
Tip: Always have a water filter handy; you never know when the need will arrive, so note down the refrigerator and the filter model. In addition, many people have queries about whether to shut the water supply off. Well, to be safe, it is recommended to do so.
Congratulations, you have successfully changed your Samsung water filter all by yourself!